From first call to final payment
JobFlow handles every step of your job lifecycle. Here is how a job moves through the system, from creation to getting paid.
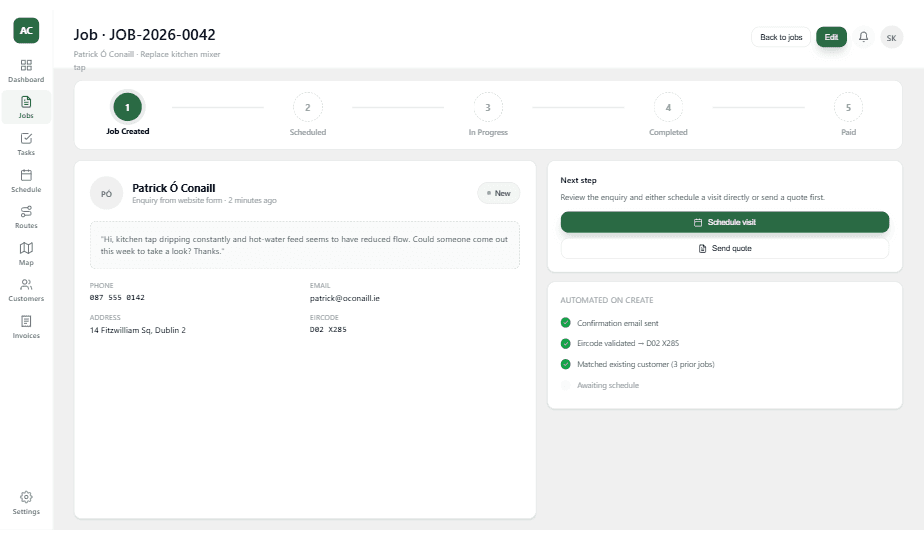
Every job starts with a few details
Create a job from an enquiry, a partner submission, or scratch. Add the customer, property, job type and any notes. JobFlow captures everything you need before the work begins.
- Quick job creation form
- Link to customer and property
- Add line items and pricing
- Attach documents upfront
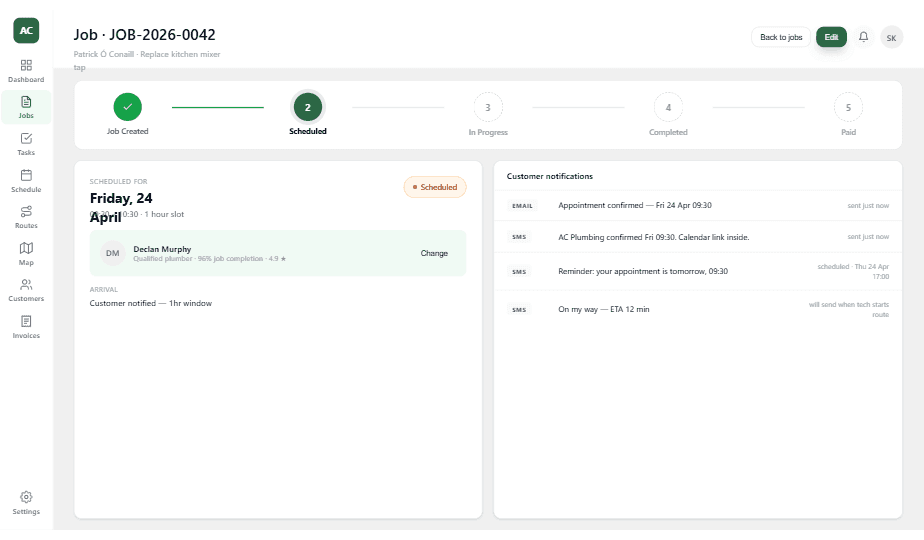
Assign it to your calendar
Drag the job onto your calendar or assign it to a team member. Set the date, time slot and duration. The customer gets an automatic confirmation if you want.
- Drag-and-drop scheduling
- Team member assignment
- Automatic customer notifications
- Recurring job support
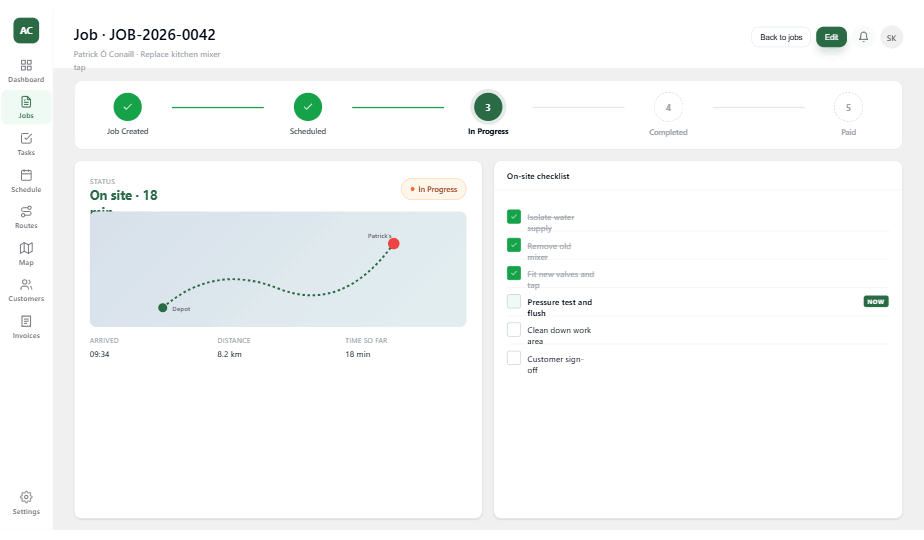
Track it from start to finish
Your team checks in when they arrive and updates progress as they work. You see real-time status without needing to call. Add photos and notes from the mobile app.
- Check-in and check-out
- Real-time status updates
- Photo and note capture
- Comments and task updates
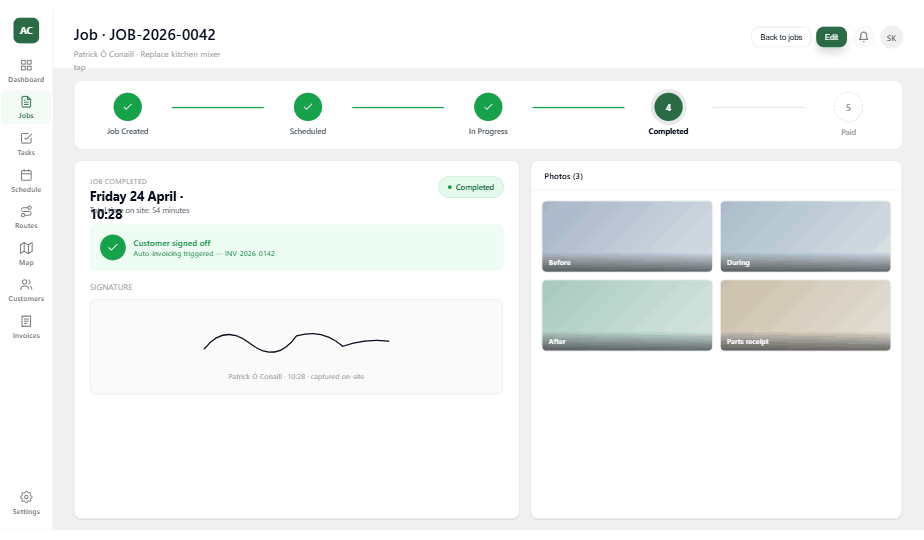
Mark it done, capture the details
When the work is finished, mark the job complete. Add final notes, attach completion photos and record any materials used. The job history is preserved forever.
- One-tap completion
- Final documentation
- Line items and costs recorded
- Certificates and deliverables tracked
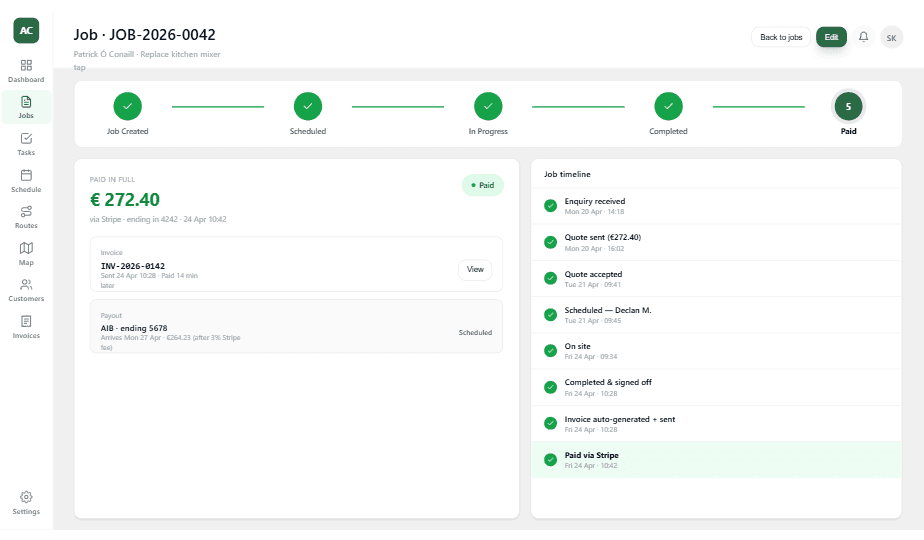
Invoice automatically or with one click
Generate an invoice the moment the job is marked complete - automatically or manually. Send it with a Stripe payment link and track when it is viewed and paid.
- Auto-invoicing option
- One-click manual invoice
- Stripe payment links
- Payment tracking and reminders